What the Great Divide Route Actually Involves
The Great Divide Mountain Bike Route has gotten complicated with all the mythology flying around. People see the Instagram posts — the sweeping basin shots, the border monument selfies — and think they understand what 2,700 miles of Rocky Mountain spine actually means. They don’t. The GDMBR runs from the Canadian border near Kalispell, Montana, all the way down to Antelope Wells, New Mexico, hugging the Continental Divide as closely as gravel roads and Forest Service access will allow. Total elevation gain sits around 200,000 feet, though you’ll find slightly different numbers depending on whether you’re following the official ACA maps or one of the crowdsourced GPX variations floating around online.
Surface breakdown matters more than most people realize — it shapes tire choice, daily mileage, and honestly your entire mental framework for the ride. About 70 percent is gravel or unpaved forest road. Another 15 percent is dirt singletrack, usually manageable but occasionally chunky enough to make you question your life choices. The final 15 percent is pavement, mostly through resupply towns or the unavoidable highway slogs in New Mexico. People expect a mountain bike route to be fun. This isn’t fun in the playful sense. It’s sustained, machinery-intensive, relentlessly rolling terrain — and it demands respect from the first pedal stroke.
Direction matters, though probably not for the reason you think. The traditional narrative pushes Canada-to-Mexico as the “right” way — riding south, gravity theoretically on your side, finishing somewhere warm. But Mexico-to-Canada riders consistently report fewer crowds on the northern stretches and better timing for dodging Wyoming’s worst weather. Both directions work. Pick one based on your actual calendar, not some romantic notion about how the route is supposed to go.
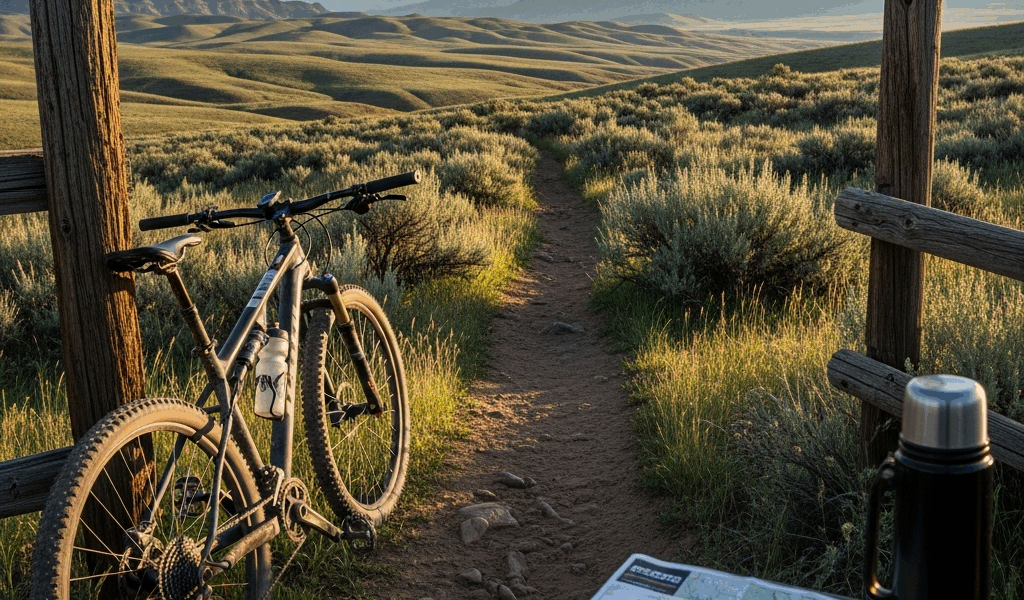
You need the official ACA maps. Not just a GPX file. Not an app. The printed Adventure Cycling Association guidebook and maps are non-negotiable at the decision points where a dozen logging roads branch off in every direction and your phone is showing zero bars. I learned this by ignoring that advice and spending 90 minutes — 90 actual minutes — picking apart a washout near southern Wyoming with a Garmin inReach and half a bar of reception. The full map set runs about $40. That’s cheap insurance against losing half a day.
Best Time to Ride and What Each Season Means
Probably should have opened with this section, honestly, because timing cascades into every other decision you’ll make. Miss the Wyoming window by a week and you’re either wallowing through swamp conditions or scrambling around fire closures that add 100 miles to your route. The June-through-September window exists for real reasons — before June, lingering snow at elevation will stop you cold; after September, you’re racing winter and losing daylight fast.
June in Montana and Idaho
Starting in early June gives you a soft opening — but soft doesn’t mean easy. The Canadian border section is usually rideable by early June, and the northern Montana and Idaho stretches have dried out enough to avoid the worst of the mud season. Elevation up here maxes around 9,000 feet, so you’re not fighting alpine snowpack. The catch: remote sections get cold. Genuinely cold. Expect nights near freezing through the Blackfoot River drainage. Pack for it, not around it.
Late June and July in Wyoming
This is the window that matters most in Wyoming’s basin country. The Great Divide Basin near Rawlins sits in a high desert rain shadow — drier than the terrain surrounding it. But hit it too early and you’re dealing with snowmelt creek crossings and boggy stretches that swallow loaded bike wheels axle-deep. Late June through July clears that. By August, wildfire smoke blankets the state and fire closures can push you 80 miles off-route. That’s not a detour. That’s a different ride.
Late July and August in Colorado
Colorado’s San Juan Mountains and the San Isabel National Forest sections need peak-season timing. Late July through early August gives you dry, rideable conditions above 11,000 feet — and that elevation is not forgiving of bad timing. Start too early and you’re slogging through snowpack and washed-out sections. Start too late and early September snow becomes a real concern on the exposed passes. This is also the busiest stretch for GDMBR traffic, which isn’t necessarily bad — company is useful when things go sideways.
August and Early September in New Mexico
New Mexico feels like mercy after Wyoming and Colorado. Lower elevation, longer daylight, warmer nights. But August monsoons hit hard and fast — flash flooding in the arroyos is not a hypothetical risk. September dries things out, but daylight shrinks and cold snaps show up early, especially around Pie Town’s elevation. Finishing by mid-September gives you a reasonable buffer against early winter weather pushing down from the north.
Resupply Strategy and Key Town Stops
The GDMBR is not a route where you coast from convenience store to convenience store every 40 miles. Gaps between towns are real, and they punish poor planning in both directions — carry too little and you’re rationing by day three; carry too much and you’re hauling dead weight that bleeds energy over hundreds of miles. The math is unforgiving either way.
The Northern Montana and Idaho Section
Kalispell to Missoula is almost civilized by GDMBR standards. Towns like Eureka and the Swan Lake area have basic supplies — enough to stock 3 to 4 days between stops. The real danger here isn’t logistics. It’s fresh legs and overconfidence. Riders consistently overload in this section, thinking they’re being smart, and then start the route already worn down. Stock what you need, not what you fear running out of.
Wyoming’s Basin Country — The Real Pinch Point
Rawlins is legendary, and not in a flattering way. The stretch from the Saratoga area westward into the Great Divide Basin is genuinely, unambiguously remote. Rawlins sits roughly 90 to 100 miles from reliable resupply in either direction. Plan for a 5 to 6 day food carry through this section — not as a worst-case scenario, as a baseline assumption. Many riders mail resupply boxes to the Rawlins post office two to three weeks ahead of their estimated arrival. That system works. Use it.
South of Rawlins toward the Colorado border, smaller stops like Encampment and Baggs offer supplementary supplies but not full restocking. A gas station with beef jerky and a cooler of Gatorade is not a grocery store. Know what’s actually available before you factor it into your carry plan.
Colorado Mountain Sections
Steamboat Springs, Creede, and Silverton are actual functioning towns — bike shops, real restaurants, gear if something fails. Colorado is almost relaxed from a resupply angle. Plan 3 to 4 day carries between towns and focus your mental energy on the terrain, which demands it. The singletrack and hiking-trail sections here require attention that logistics shouldn’t compete with.
New Mexico — Pie Town and the South
But what is Pie Town, really? In essence, it’s a dot on the map with a diner, a small store, and limited camping. But it’s much more than that — it’s the psychological crux of the New Mexico section, a place where the gap between expectation and reality hits hardest. Roughly 80 miles of reliable resupply in either direction. Plan a 5 to 6 day food carry entering from the north. Water is more available here than in Wyoming, which helps. Services, however, are minimal in a way that’s worth taking seriously.
The final push through Animas Valley toward the border has small towns — Hachita, Columbus — but expect minimal commercial services, and don’t count on them. Most finishers carry their last real resupply out of Deming, which sits roughly 90 miles north of the border crossing at Antelope Wells. Stock up there. Don’t improvise that last stretch.
Practical Resupply Math
Assume 4,000 to 4,500 calories per day riding loaded. In remote sections, calorie density is everything — peanut butter, mixed nuts, rice, olive oil, pasta. Fresh food is a morale boost, not a viable carry strategy. I’m apparently someone who can sustain enthusiasm for peanut butter and dried mango for days on end, and that approach works for me while fresh produce never survives more than 36 hours in a frame bag. Don’t make my mistake of testing that theory deep in the Wyoming basin.
Surface Conditions and Equipment That Fits This Route
The terrain demands specific geometry and tire sizing — full stop. This isn’t XC trail riding. It’s sustained gravel and dirt hauling under 40 to 50 pounds of loaded weight, day after day, across 2,700 miles of varied surface.
Tire Width and Rolling Resistance
While you won’t need downhill casing tires, you will need a meaningful contact patch. Minimum usable tire width is 2.0 inches front and rear — and wider is genuinely better. A 2.4 to 2.6 inch tire absorbs rock gardens and sharp basin gravel without demanding obsessive pressure management. Tubeless setups are the right call here. Flat probability drops, you run lower pressures without pinch-flat risk, and sealant handles the small punctures that would otherwise stop you cold on a tubed setup. Standard tubed tires work — riders finish on them every year — but they add tube weight and require constant pressure tweaking.
Hardtail Versus Full Suspension
Full suspension bikes work on the GDMBR. Hardtails outperform them. I’ve ridden both. The hardtail rewards good technique on chunky terrain and punishes lazy line choice with arm fatigue — which is honest feedback. Full suspension absorbs energy that should be going into forward momentum, and on gravel roads, which constitute 70 percent of this route, that efficiency gap compounds over 2,700 miles. Maintenance on a loaded tour is also simpler on a hardtail — fewer pivot bearings to pack grease for, fewer seals to monitor in the field.
Frame Clearance and Geometry
Fender clearance for 2.4-inch tires with room for mud accumulation is non-negotiable. Aggressive XC geometry becomes punishing by week two — relaxed trail geometry reduces fatigue in a measurable, daily way. Chainstay length should exceed 16.5 inches; shorter bikes handle poorly under load weight on steep descents. Seat tube angles in the 72 to 74 degree range feel right for sustained climbing with panniers or frame bags loaded.
The Loaded Versus Ultralight Debate
Some riders run minimal setups — 18 to 22 pound bike, 15 to 20 pounds of gear, bivvy camping, no stove, no redundancy. Others run 30-plus pound setups with a three-season tent, a JetBoil, and a full food carry. Both camps finish the route every summer. Ultralight demands discipline and tolerance for genuine discomfort. Loaded touring permits flexibility, actual sleep, and the ability to wait out a storm without suffering through it. That’s what makes the loaded approach endearing to riders who aren’t trying to set records. Choose based on honest self-assessment, not some abstract purity metric you read in a forum.
Alternate Sections and Known Problem Stretches
The official GDMBR route is not fixed law. Seasonal closures, personal comfort thresholds, and local knowledge generate alternates that experienced riders use without apology.
Wyoming Alternates
The Steamboat Springs detour around the Sierra Madre is the most common northern alternate — it’s officially marked on ACA maps and adds roughly 40 miles, but sidesteps higher elevation snow risk in early season. Riding in early June? Take it. The main route can be genuinely impassable from snowmelt until mid-June, and that’s not a condition you want to discover at mile 60 of a remote section.
The Brush Mountain Lodge alternate near the Wyoming-Colorado border is less documented. Local knowledge riders use it to bypass a particularly rough service road stretch. It’s passable, but it’s unsigned — know the route before you commit, or stick to the main line and accept the rough miles.
Fire Closure Alternates
August fire closures in Wyoming and Colorado force real-time rerouting. These aren’t pre-planned alternates in any guidebook; they’re navigational scrambles using current information from riders a few days ahead of you on trail. Online GDMBR communities — particularly the Facebook groups and forums — track active closures week by week. Monitor them through July and into August. An 80-mile forced alternate is manageable when you know about it three days out. Getting surprised by a closure at the trailhead is a different situation entirely.
New Mexico Flexibility
New Mexico offers the most route flexibility of any section. Multiple town-to-town connections exist, and monsoon flooding in August can push you temporarily west toward Highway 60 without wrecking your timeline. These adjustments aren’t failures — they’re normal ride management. The terrain here allows for it in a way Wyoming simply does not.
Permits and Protected Land
Most of the GDMBR crosses national forest land with minimal permit requirements. The exception is a short section threading near the Gila Wilderness in New Mexico — off-trail travel technically requires permits, and the GDMBR route runs close enough to that boundary to warrant confirmation. BLM and national forest closures shift annually. First, you should contact local ranger districts 2 to 3 months before your ride date — at least if you want accurate current information rather than last year’s conditions. Checking the week before is too late to adjust your itinerary meaningfully.
Cycling the Great Divide isn’t complicated once you eliminate ignorance. Every question has a documented answer somewhere. So, without further ado — go find the answers before you need them out there.

Stay in the loop
Get the latest cycle routes world updates delivered to your inbox.